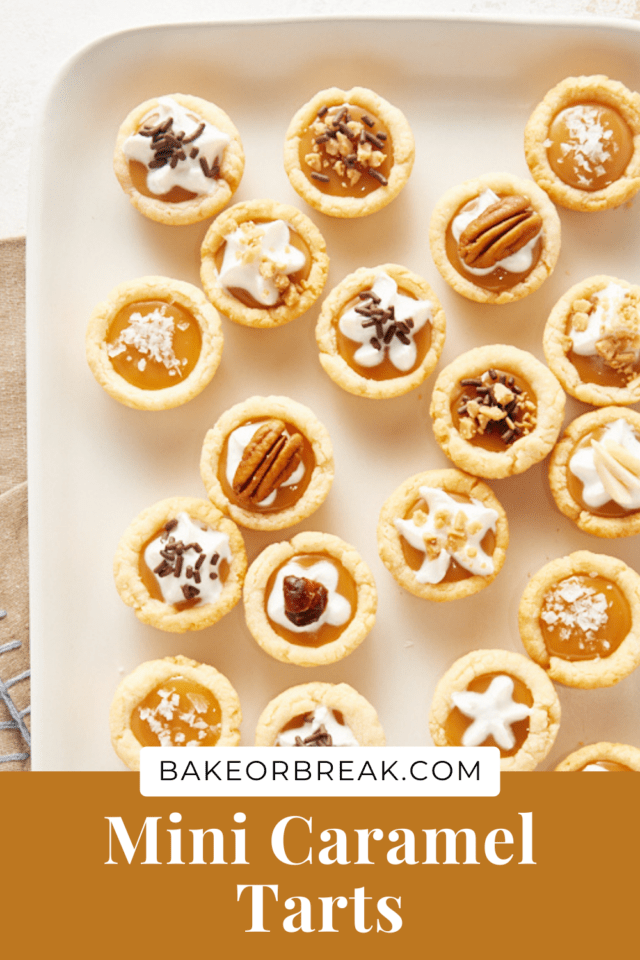
These 6-ingredient Mini Caramel Tarts are a favorite for entertaining because you can make them ahead and garnish with all your favorite toppings when it’s time to serve!

These Mini Caramel Tarts are so good in so many ways that I am not entirely sure where to start to tell you about them. If I have to pick one quality to begin with, let’s go with flavor. If you say “cream cheese pie crust” and “caramel,” I’m pretty much sold without knowing anything else. With these tarts, you do indeed begin with cream cheese pie crust. Then, fill that with a simple caramel filling. What comes next? That’s up to you! A pinch of sea salt, whipped cream, glazed pecans, a single toasted hazelnut, dried fruit, chocolate shavings… All of these are excellent answers.
Why You’ll Love This Mini Caramel Tart Recipe
- Perfect for a party. Mini desserts are great for large-ish gatherings because there’s no cutting slices of anything.
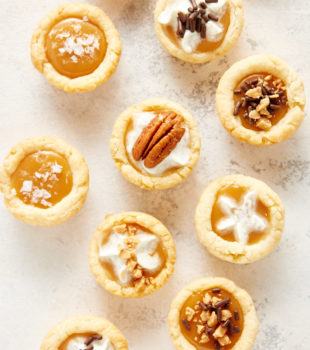
- Endless topping options. With these Mini Caramel Tarts, you can make many, many variations just by using different toppings. Just imagine these in all their garnished glory on a dessert tray.
- Short ingredient list. The base of this recipe requires just 6 ingredients!

What You’ll Need
Scroll down to the recipe card to find the ingredient quantities and recipe instructions.
- Cream cheese – Bring the cream cheese to room temperature so it will mix smoothly.
- Butter – Set out the butter about 30 minutes before you’re going to start baking.
- Granulated sugar
- All-purpose flour – Measure by weight for best results. Otherwise, spoon and sweep.
- Soft caramels – These are the chewy kind that are usually found on the candy aisle. Common brands are Werther’s and Kraft.
- Heavy cream
Topping Ideas for Mini Caramel Tarts
Pick one topping or several. You can even combine a few!
- Sweetened whipped cream – You can dollop it on top of the tarts, or pipe it for a fancier look.
- Coarse salt – For the sweet and salty fans
- Chocolate shavings or sprinkles
- Nuts – Pecans, almonds, walnuts, hazelnuts… whatever you like! Try toasting or glazing them for more flavor.
- Toffee bits
- Dried fruit
- Toasted coconut

How to Make Mini Caramel Tarts


- Make the dough for the crust. First, beat the cream cheese, butter, and sugar until creamy. Next, with the mixer on low speed, add the flour in a few portions, and mix until combined.
- Portion the dough. Form the dough into balls, using a tablespoonful of dough. If you have a very sturdy 1-tablespoon scoop, that will speed up the process. Place the dough balls on a lined rimmed baking sheet, and refrigerate for 1 hour.
- Shape the crusts. First, place a ball of dough in the cups of 48 lightly-greased mini muffin cups. Next, press the dough into the bottom and up the sides of the cups. Place the muffin pans in the refrigerator for about 15 minutes to let the dough rest.


- Bake. The tart shells will need to bake for 12 to 15 minutes at 375°F. The edges of the crusts should be lightly browned. Place the pans on a wire rack to cool.
- Make the filling. Place the caramels and cream in a microwave-safe bowl. Heat in the microwave at half-power in 30-second increments until the caramel melts when it’s stirred. (You can also melt the caramel with the cream in a heavy saucepan on the stovetop over medium-low heat.) Stir until the mixture is smooth.
- Fill the tarts. Use about a teaspoon of the caramel mixture to fill each tart shell. Place the filled tarts back in the refrigerator for at least an hour to allow them to set.
- Add toppings. Set the tarts out at room temperature for about 20 minutes before serving. Garnish with sweetened whipped cream, chocolate shavings, nuts, or any of your favorite toppings.

Tips for Success
- Use light-colored metal pans. You’ll get the best, most consistent results.
- Don’t skip the chilling time. The caramel tartlet dough needs to rest after being portioned and again after being shaped.
- Use a tart tamper or the handle of a wooden spoon. A tart tamper makes easy, quick work of shaping those little balls of dough into tart shells. If you don’t have one, use your fingers to press the dough into the bottom and up the sides of the cups. Next, use the handle of a wooden spoon to finish shaping.

How to Store Caramel Tartlets
- Refrigerator: Keep these tarts tightly covered and refrigerated for up to a week. For best results, store them without any toppings.
- Freezer: To freeze these tarts, first place them (without toppings) in a single layer on a sheet pan in the freezer for a couple of hours to let them freeze. Next, wrap the tarts in plastic wrap. Finally, wrap them again in aluminum foil or place them in a freezer-safe container or bag. Stored properly, they should keep in the freezer for up to 3 months. Thaw overnight in the refrigerator.
More Mini Pie Recipes


Mini Caramel Tarts
Ingredients
- 8 ounces (226 g) cream cheese, softened
- 1 cup (226 g) unsalted butter, softened
- 3 tablespoons (37 g) granulated sugar
- 2 ¾ cups (330 g) all-purpose flour
- 9 ounces (255 g) soft caramels, about 30 caramels
- ⅓ cup (80 ml) heavy cream
- optional garnishes: sweetened whipped cream, coarse salt, coconut, dried fruits, toasted nuts
Recommended Products
Instructions
- Using an electric mixer on medium speed or a food processor, beat the cream cheese, butter, and sugar until creamy.
- Reduce mixer speed to low. Gradually add the flour, mixing just until combined.
- Using a tablespoonful of dough at a time, roll the dough into balls and place on a baking sheet lined with parchment paper. Refrigerate for 1 hour.
- Lightly grease 48* mini muffin cups.
- Place a dough ball in each muffin cup. Press the dough into the bottom and up the sides of the cup.** Place the pan in the refrigerator for about 15 minutes.
- Preheat oven to 375°F (190°C). Bake 12 to 15 minutes, or until the edges of the tart shells are lightly browned.
- Place pans on wire racks to cool. If the bottom of the crusts puffed up a bit, use the handle of a wooden spoon to press them lightly back down.
- Allow the tart shells to cool. Then remove the tarts to a rimmed baking sheet.
- Place the caramels and cream in a microwave-safe bowl. Heat at half-power in the microwave in 30-second increments until the caramel melts when stirred. Stir until smooth.
- Fill each tart shell with about 1 teaspoon of caramel mixture. Place the tarts in the refrigerator for at least an hour to allow them to set.
- Allow the tarts to sit at room temperature for about 20 minutes before serving. Garnish as desired before serving.
Notes
- *After you roll all of the dough into balls, adjust this number if necessary.
- **I use a tart tamper to press the dough into the cups. You can also just use your fingers. The end of the handle of a wooden spoon will help get the bottom flat all the way to the sides. If the dough sticks to the tamper or spoon, you can dip it in flour or spray it lightly with cooking spray.


19 Comments on “Mini Caramel Tarts”
Thank you Jen! You just put a smile on my face this grey, freezing cold Monday morning!
These look so tasty. I love cream crust. (Especially, with pecan tassies). I can only imagine just how wonderful these taste! I don’t need to imagine…pulling out the cream cheese right now! Guess what? I have a bag of those Wether Caramels sitting in my pantry too! This is meant to happen today…..
Caramel always brightens my day! These tarts are lovely!
These are so cute! I love all the different finishes you experimented with
omnomnommmmmmmm!!! sooo gooooooooood!
tiny is dangerous J!
very dangerous! LOL
PERFECTION! Love love love!
These are perfect! I made tarts today, but with a pecan filling- so delicious! I love mini desserts!
After my epic caramel pie fail last week, I am definitely overdue for a makeup recipe! These are certainly it. How cute!
Jennifer,
These tarts are adorable. Pinned.
Thanks.
I love anything bite-sized. I am definitely adding these to my Christmas baking. Pinned!!
Love mini caramel tarts, I’ve made some too, but these with cream cheese sound interesting, I am eager to give them a try:)
where did you get the tart tamper i guess it must be a small one. i have a tartlet pan .but it didnt come with the tamper. william sonoma sells one with tamper
Pearse, the tart tamper I have came from The Pampered Chef. It’s also available at Amazon.
Still haven’t found my tart tamper after a move 4 years ago. Maybe I will have to break down and get a second one until I find it. I have to say I’m more excited about crust I don’t have to roll out and cut. HA Not a big pie baker for that very reason. I love the sounds of this recipe and I love that it makes so many. Can’t wait to try it!! I don’t think I’ve seen the caramels you mentioned though others have said they see them around in the stores. I can cut off my 5# block instead I guess. Thanks, Jennifer.
Individual tarts are always better! And you’re right, the flavor combo makes this a ‘must make’ already!
Can you freeze these with the caramel in
Hi, Crystal. I’ve not tried freezing these, but I think they’d do okay if they’re well wrapped and allowed to thaw overnight in the refrigerator.
How long can these tarts stay in the refrigerator
Hi, Grace. They should keep for three or four days tightly covered in the refrigerator.