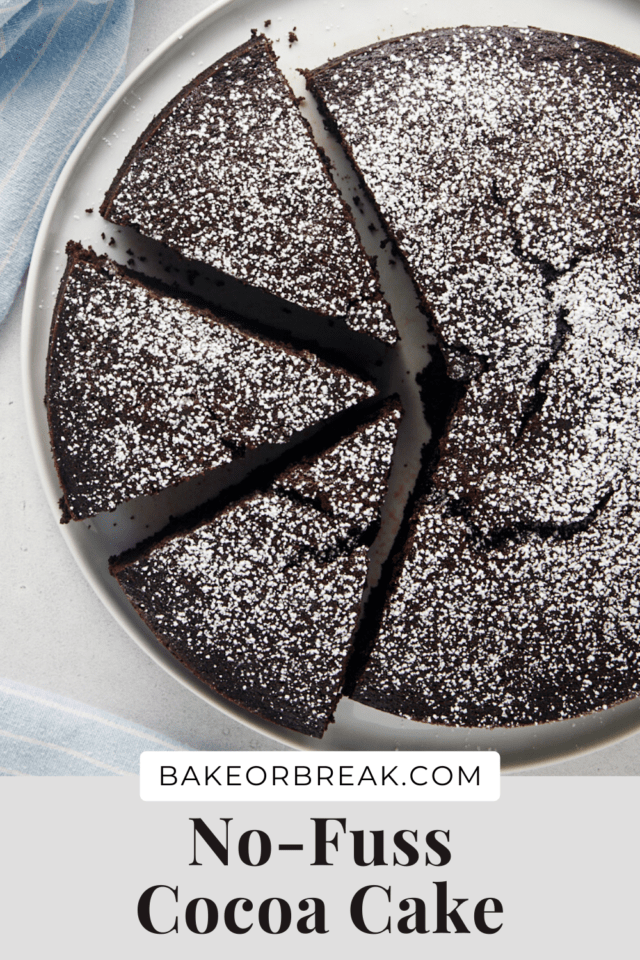
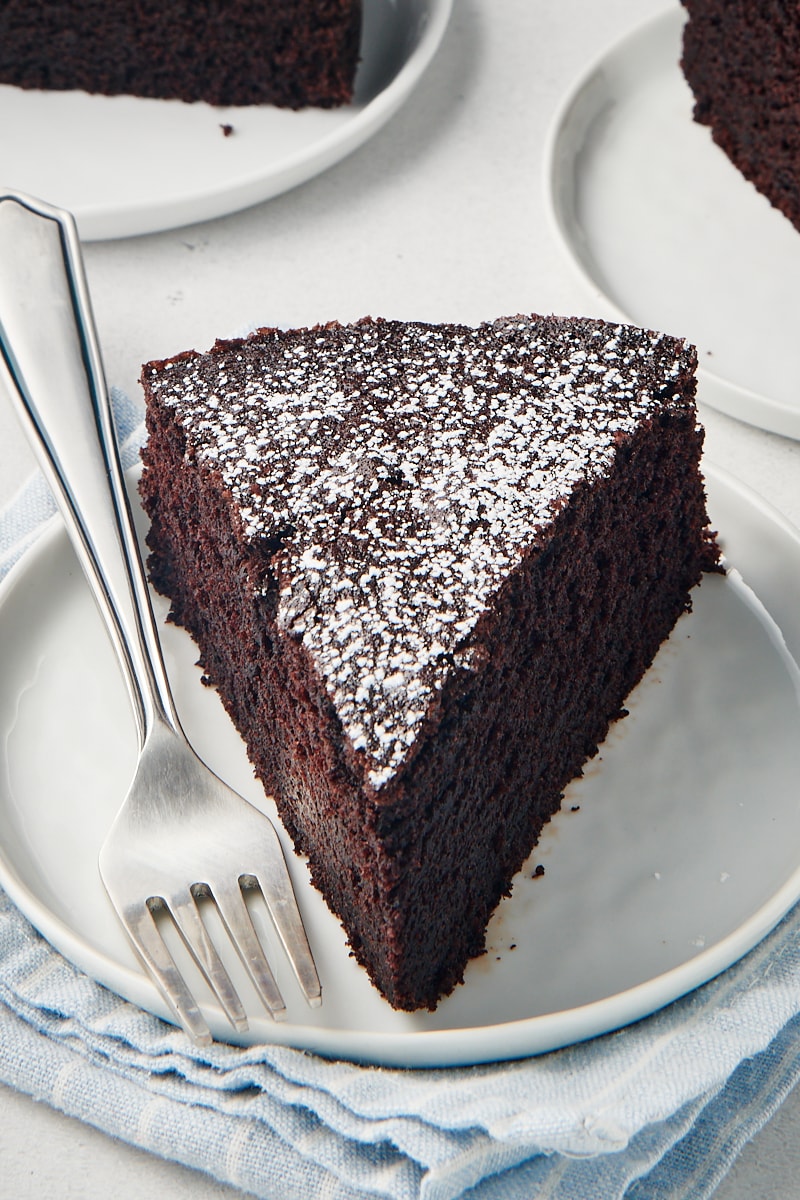
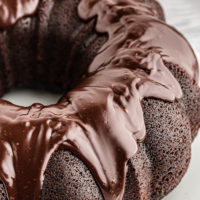
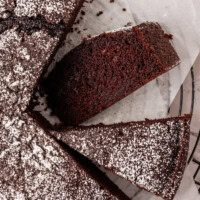
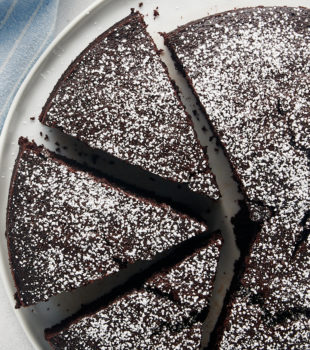
This cocoa cake is a simple, unfrosted chocolate cake with a deep cocoa flavor and soft, tender crumb — perfect for an easy, everyday dessert.
This cocoa cake is a great example of how simple ingredients can come together to make something really good. Made with plenty of cocoa powder and brown sugar, it has a deep chocolate flavor and a soft, tender texture.
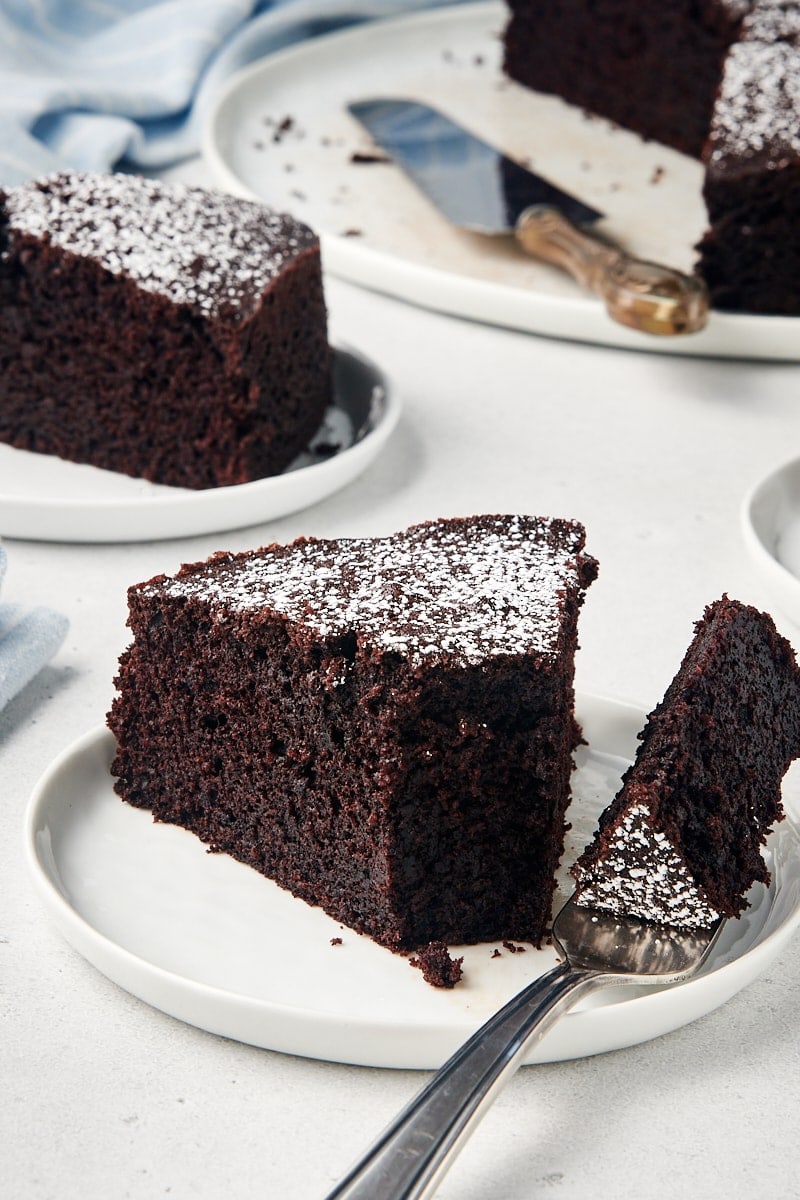
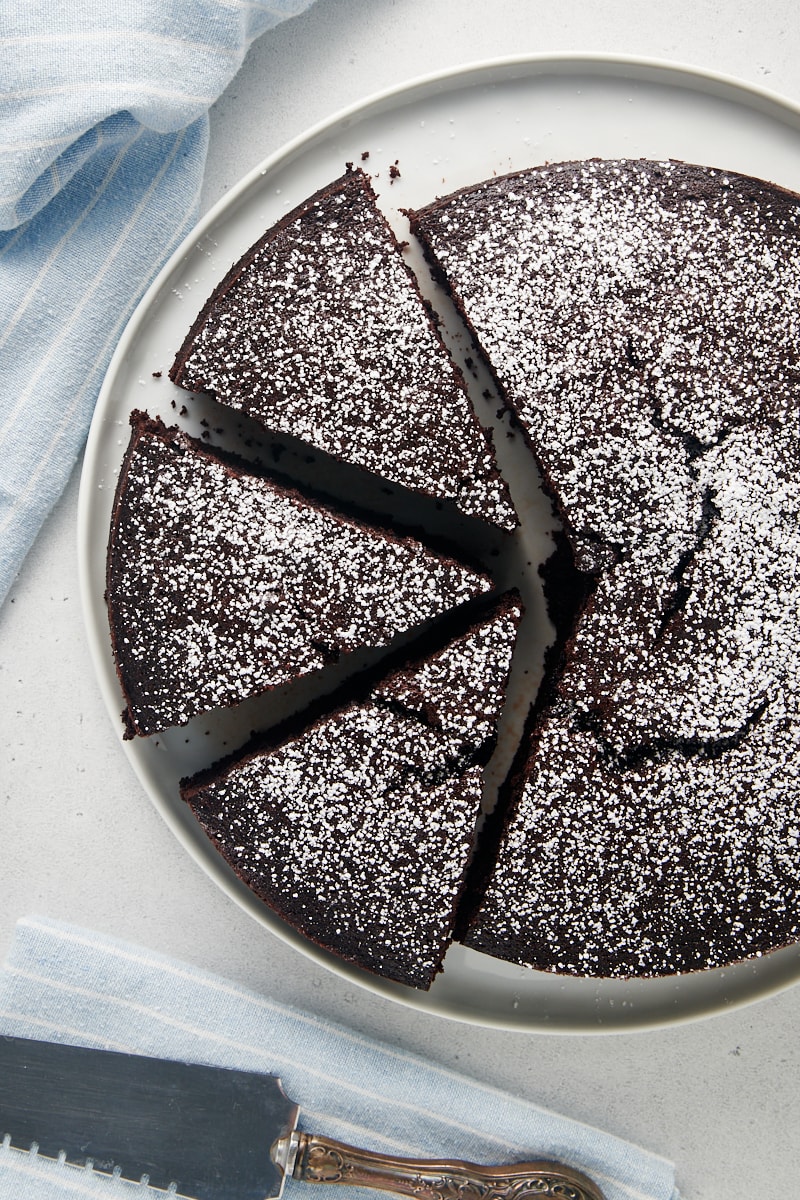
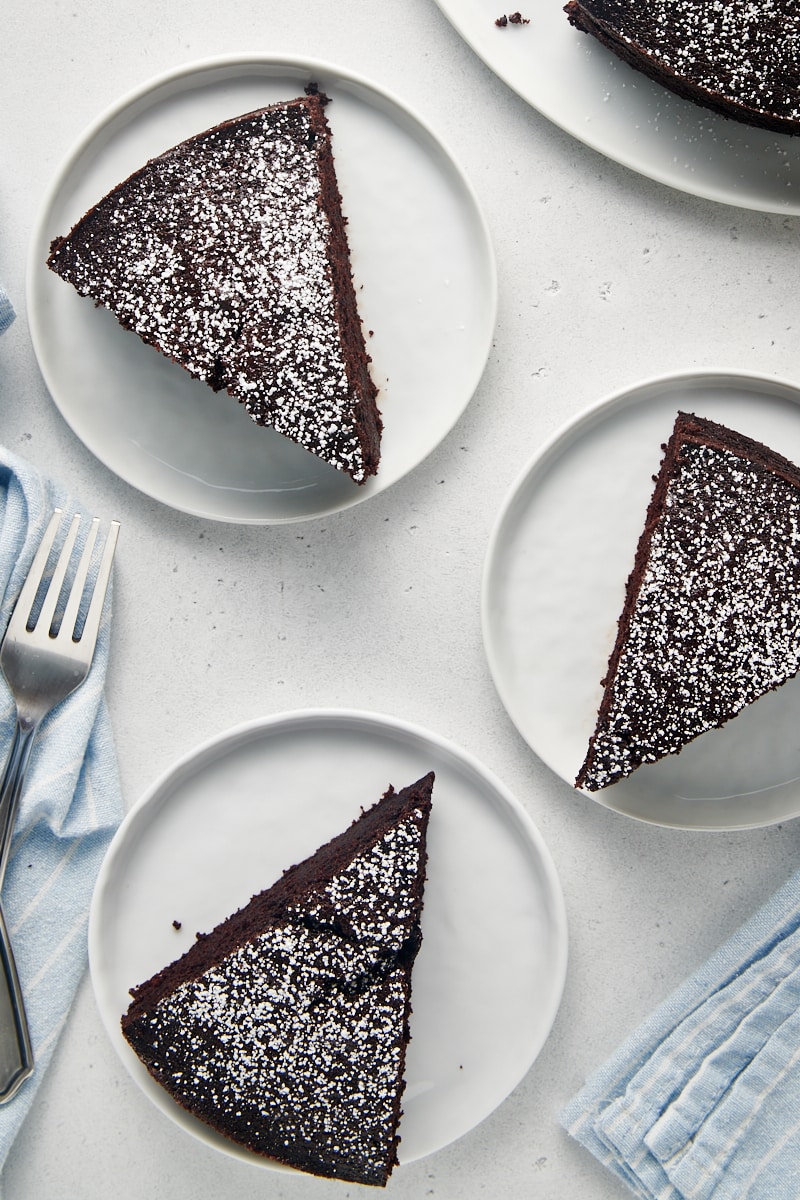
It’s a straightforward, no-fuss cake — no layers, no frosting — just a single cake baked in one pan and finished with a light dusting of powdered sugar. It’s perfect when you want something chocolatey without a lot of extra effort.
Why You’ll Love This Cocoa Cake Recipe
- Simple and unfussy. No layers or frosting — just mix, bake, and serve.
- Deep chocolate flavor. Cocoa powder and brown sugar give this cake a rich, well-rounded chocolate taste.
- Soft, tender crumb. The balance of butter and water helps create a moist, tender texture.
- Easy to serve anytime. A dusting of powdered sugar is all it needs, making it perfect for casual desserts or afternoon treats.
What You’ll Need
Scroll down to the recipe card below this post for ingredient quantities and full instructions.
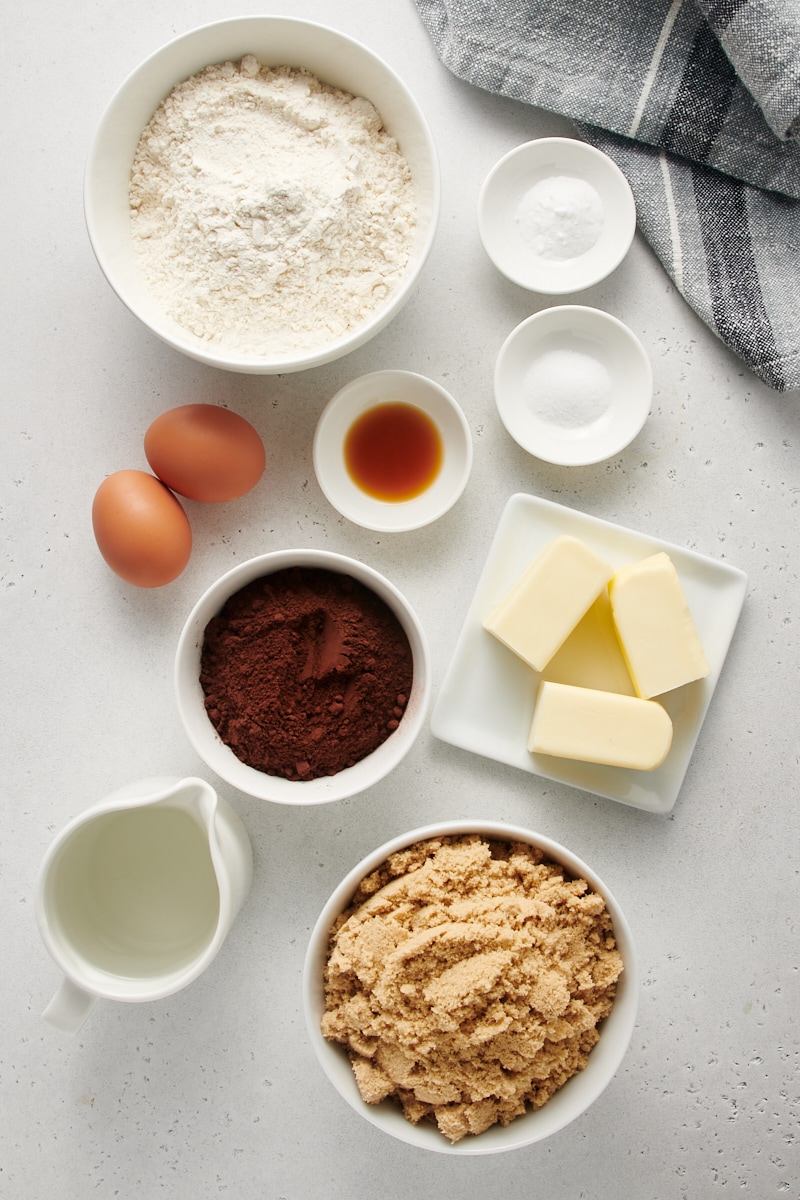
- All-purpose flour – Learn more: How to Measure Flour
- Unsweetened cocoa powder – Be sure to use cocoa powder, not hot cocoa mix.
- Baking soda
- Salt
- Unsalted butter – Learn more: Unsalted or Salted Butter: Which is Better for Baking?
- Light brown sugar
- Eggs – Set these on the counter to come to room temperature, along with the butter.
- Vanilla extract
- Water
- Confectioners’ sugar – Also known as powdered sugar.
Dutch-Process Cocoa Powder vs. Natural Cocoa Powder
When it comes to cocoa powder, the two most widely-available varieties are Dutch-process cocoa and natural cocoa.
Natural cocoa is the more popular of the two—think of it as your traditional cocoa powder. It’s made by removing the cocoa butter from cacao, leaving behind a fine powder.
Dutch-process cocoa takes things a step further by removing the cocoa butter and adding an alkalizing agent, which reduces the cocoa’s acidity. Dutch-process cocoa has a smoother flavor, and it’s darker in color.
Unless a recipe specifies one or the other, you can use either. (That’s the case for this cocoa cake recipe.) But—and this is a big but!—if a recipe calls for a specific type of cocoa, you should not substitute the other. Because natural cocoa powder is more acidic, it behaves differently in a recipe than Dutch-process cocoa, so it can throw off how a recipe rises (or not) if you use the wrong type of cocoa powder.
How to Make Cocoa Cake
Here’s what you’ll need to do to make this simple chocolate cake:
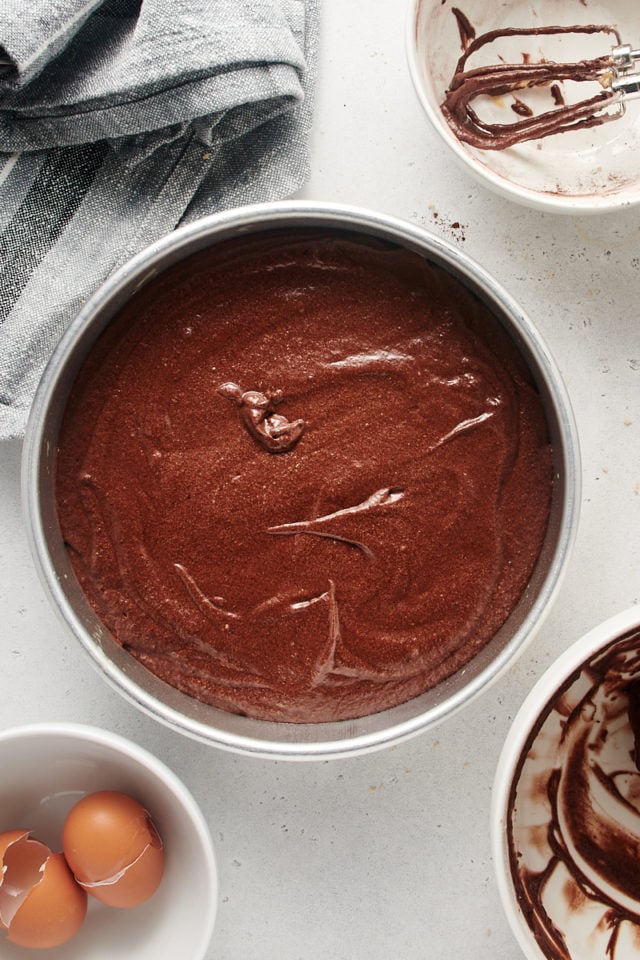
Prepare.
Preheat your oven to 350°F and grease a 9-inch round cake pan with butter. Dust the pan with flour, then tap out the excess.
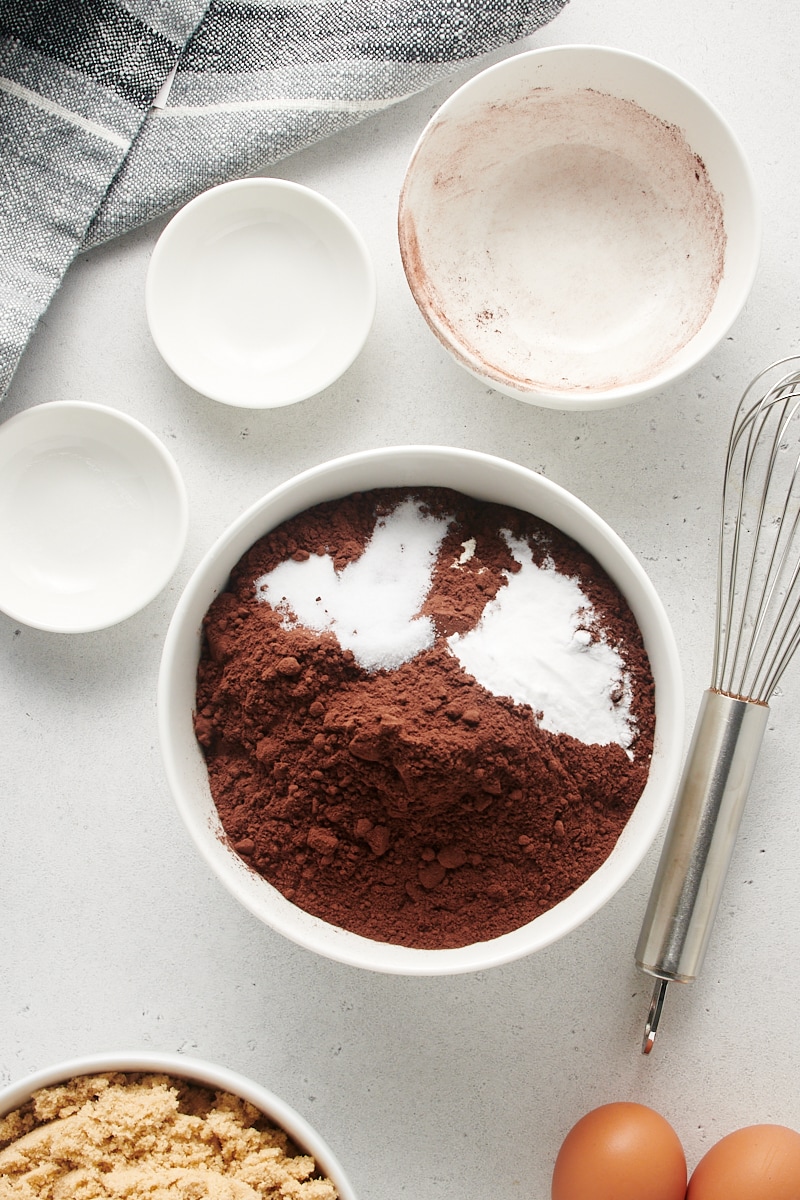
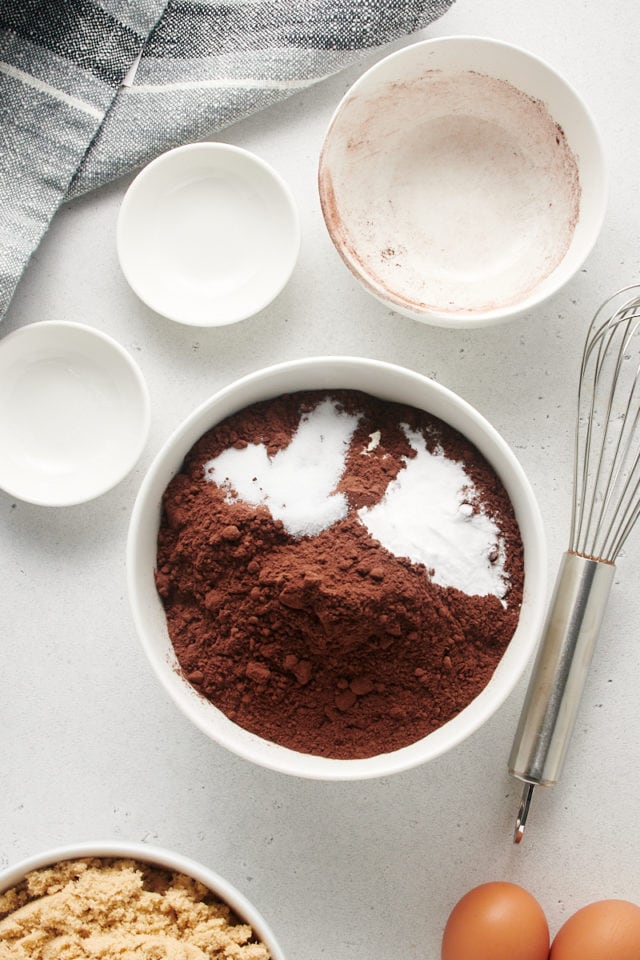
Combine the dry ingredients.
Whisk the flour, cocoa, baking soda, and salt in a mixing bowl.
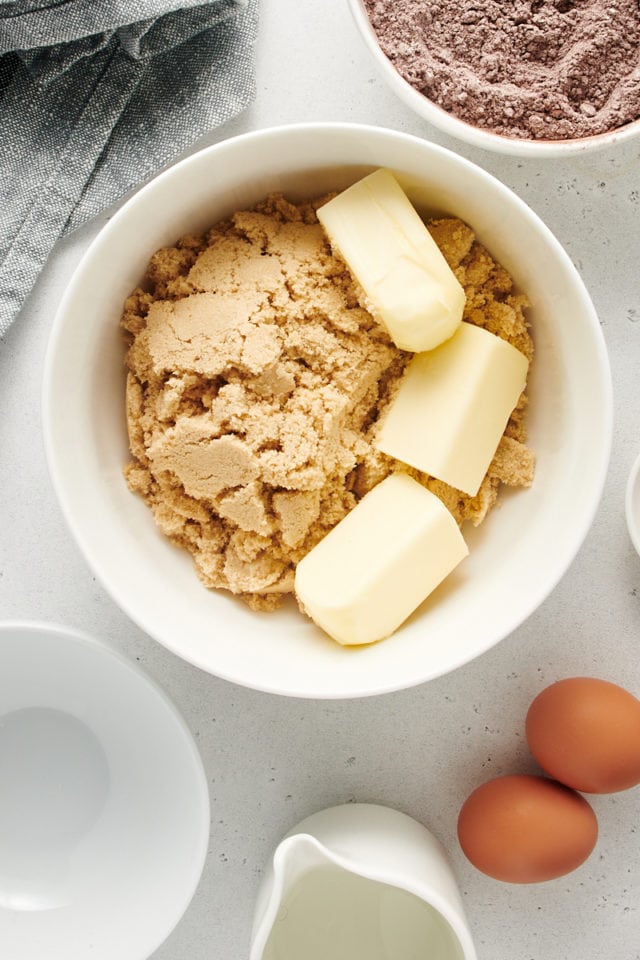
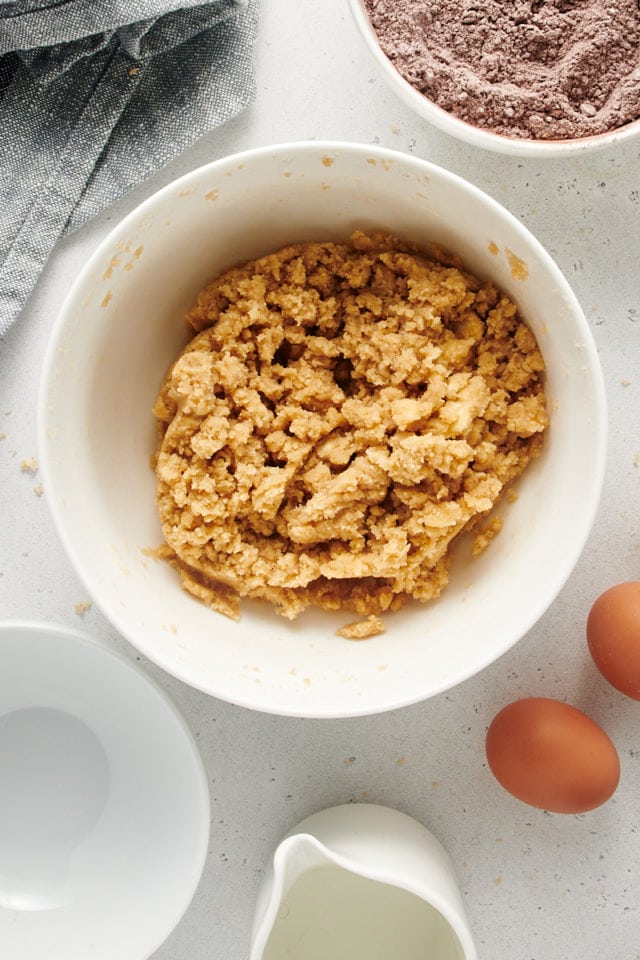
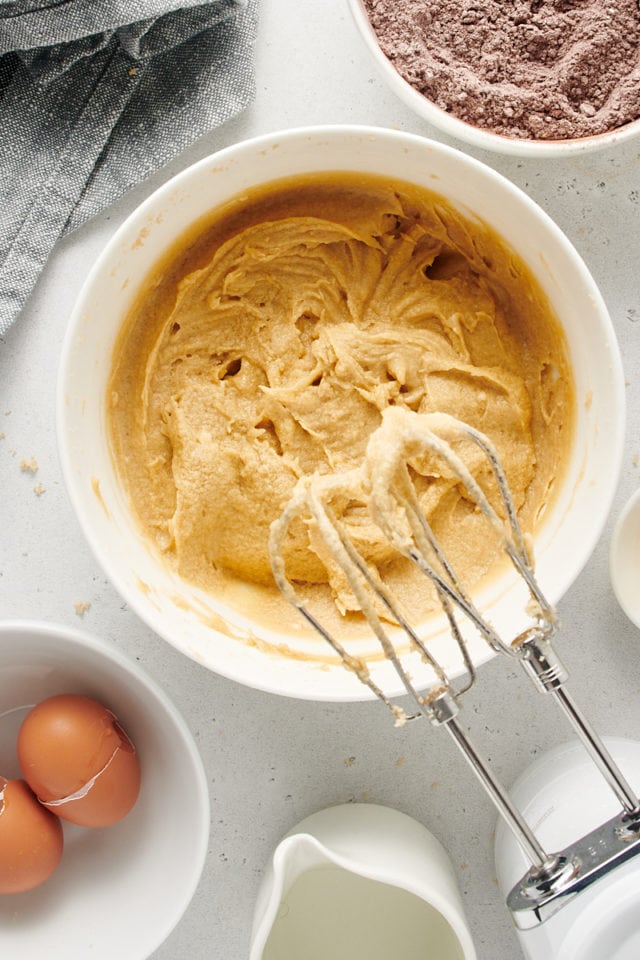
Mix the wet ingredients.
Use an electric mixer on medium speed to beat the butter and brown sugar until the mixture is pale and fluffy. Beat in the eggs one at a time, followed by the vanilla.
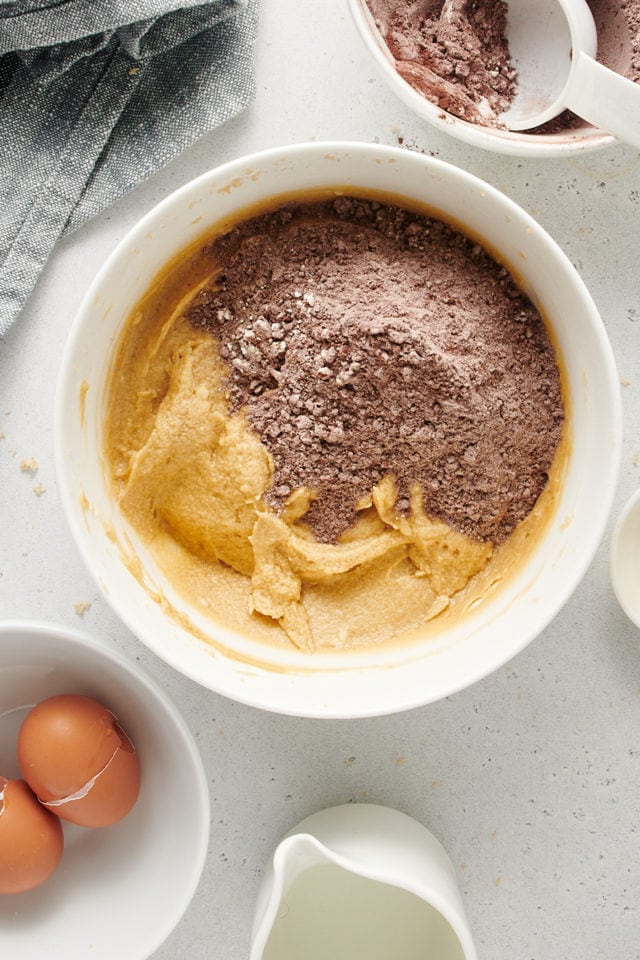
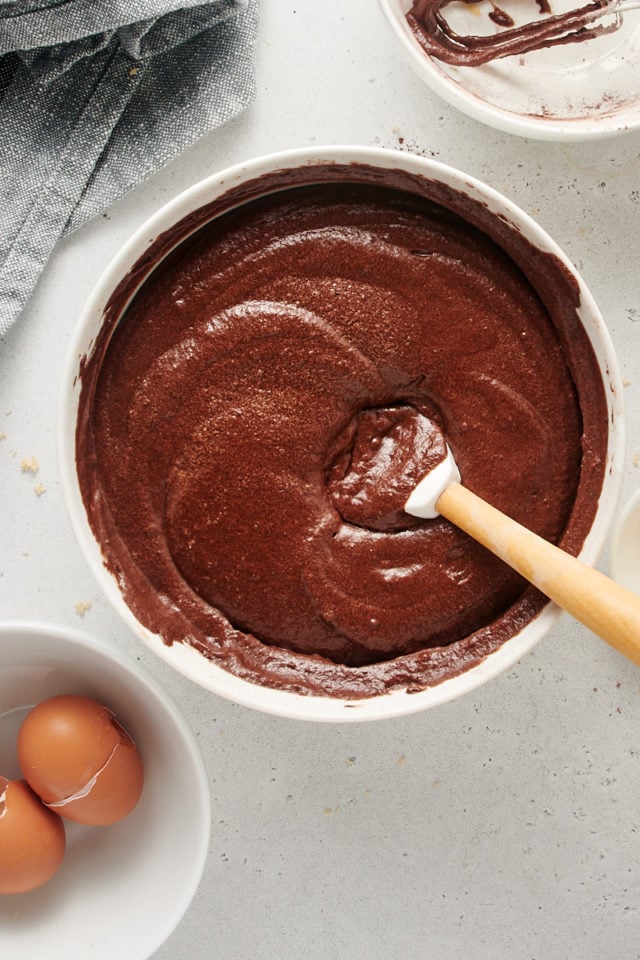
Finish the batter.
Add the dry mixture to the wet mixture in batches, alternating with water and beginning and ending with the dry ingredients. Mix until just combined.
Bake.
Pour the batter into the prepared pan and bake for 55 to 60 minutes, or until the cake springs back when you gently poke it and a toothpick inserted into the center comes out clean.
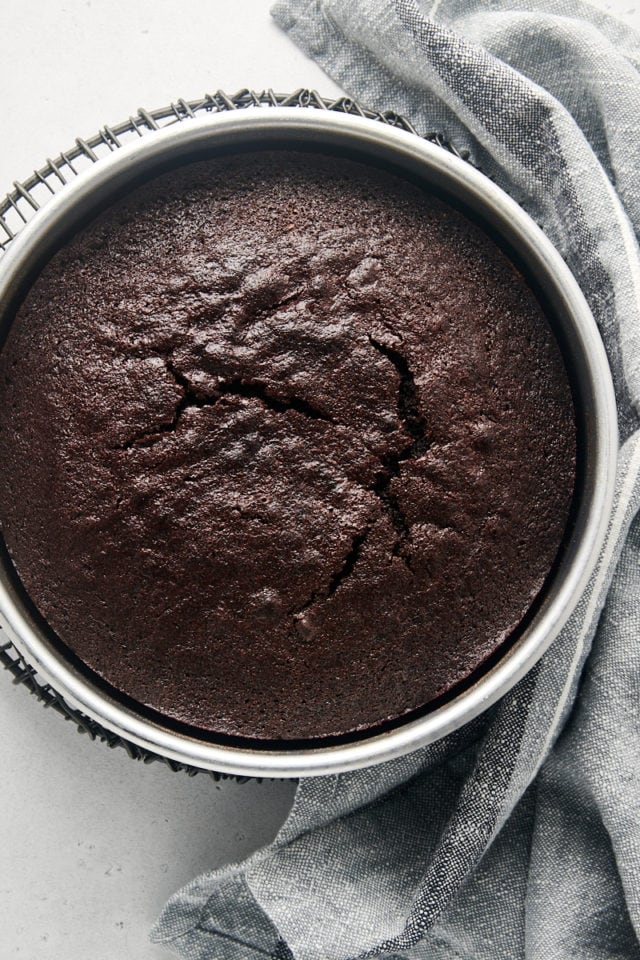
Cool and serve.
Let the cake cool in the pan for an hour; carefully invert it onto a wire rack, then again onto a serving plate. Dust with confectioners’ sugar before slicing and serving.

Tips for Success
Want to make sure your cocoa cake turns out perfect? These hints and tips will help!
- Don’t skip the flouring. When you’re making a cake with frosting, you can cover over any imperfections if the cake doesn’t come out of the pan smoothly. Because this cake isn’t frosted, if some of it sticks to the side of the pan when you invert it, it will show. This is why flouring the pan is so important! It’s the best way to keep the cake from sticking. If you have a cooking spray with flour, that should work, too.
- Use room temperature ingredients. You’ll always get fluffier baked goods when your ingredients are at room temperature when you start a recipe. That’s because the batter is able to hold more air when it’s beaten, and more air means a light, fluffy texture. Depending on how warm your kitchen is, don’t let the butter come quite all the way to room temperature, as that may be too soft for creaming. Read more: How to Soften Butter
- Don’t over-mix. It’s always better to have a few streaks of flour on the side of the bowl than to mix the heck out of your batter. Over-mixing means the flour will form tough gluten strands, which is terrible for the texture of your cake.
Simple Cake Topping Ideas
Although the appeal of this cake is its simplicity, if you’re making it for an impromptu get-together, you might want to jazz it up a little bit with some garnishes that you already have on hand. Here are some ideas:
- Add fresh fruit. Arrange strawberries, raspberries, and blueberries on the top of the cake to gussy it up. In the fall, pomegranate arils are pretty, too.
- Serve it with whipped cream. Homemade sweetened whipped cream is a cinch to make!
- Drizzle it with salted caramel. Use your favorite store-bought caramel, or try making your own. Add toasted or glazed pecans, too, for a turtle-inspired dessert!
How to Store
Room temperature: You can store this cocoa cake wrapped or in an airtight storage container at room temperature for 3 to 4 days.
Freezer: Freeze this cake for up to 3 months; you can wrap the whole thing or individual slices, then store it in an airtight container or freezer bag. Let it thaw at room temperature or warm your cocoa cake in the microwave before serving.
More Easy Chocolate Cake Recipes
Cocoa Cake
Ingredients
- 2 cups (240 g) all-purpose flour
- ¾ cup (64 g) unsweetened cocoa powder
- 1 ¼ teaspoons baking soda
- ¾ teaspoon salt
- ¾ cup (170 g) unsalted butter, softened
- 1 ¾ cups (350 g) firmly packed light brown sugar
- 2 large eggs
- 1 teaspoon vanilla extract
- 1 ⅓ cups (320 ml) water
- confectioners’ sugar, for dusting
Recommended Products
Instructions
- Preheat oven to 350°F (175°C). Butter a 9-inch round (2 inches deep) cake pan. Dust with flour and knock out the excess.
- Whisk together the flour, cocoa, baking soda, and salt. Set aside.
- Using an electric mixer on medium speed, beat the butter and brown sugar until pale and fluffy. Add the eggs, one at a time, beating well after each addition. Mix in the vanilla.
- Add the flour mixture to butter mixture in batches, alternating with water. Begin and end with flour. Mix just until combined.
- Pour the batter into the prepared pan. Bake 55-60 minutes, until the cake is springy to the touch and a toothpick inserted into the center comes out clean.
- Cool in the pan on a wire rack for an hour. Then invert onto a wire rack, then onto serving plate. Dust with confectioners' sugar before serving.
Video
Notes
- Recipe slightly adapted from Gourmet.
- How to store: You can store this cocoa cake wrapped or in an airtight storage container at room temperature for 3 to 4 days. Freeze the cake for up to 3 months; you can wrap the whole thing or individual slices, then store it in an airtight container or freezer bag. Let it thaw at room temperature or warm in the microwave before serving.


44 Comments on “Cocoa Cake”
Yummm sometimes the simplest things are the best, this looks awesome!
I’ve been looking for a simple chocolate cake to break in a couple of new pans. I think this is the one! Thanks…
This sounds lovely! I adore simple cakes like this. Perfect!
Sounds great! I am craving chocolate and was going back-and-forth between making a Texas sheet cake and a pudding cake, but now this sounds even better.
Perfect for those nights when my husband jokes, “And where’s my chocolate cake?” What an awesome surprise this would be.
the best things are simple.This cake looks like those heavenly group of cakes I eat.
a plain cocoa cake sometimes is better than over decorated and full of different ingredients cake, simple is better and the cake looks simple and delicious
This maybe simple but it’s absolutely killer !!
Love this recipe and the pictures. The cake looks amazing, and I like that it´s not complicated to make. Thanks for sharing.
Simple and chocolate can’t get much better than that.
Amazing cake. I love chocolate so much.
This looks so good. I was going through the recipe but can’t seem to figure out where the water comes into it. Am I missing something?
TiKi, it’s in the 4th step. It’s added alternating with the dry ingredients.
Let me preface with the fact that this is my favorite site!! LOVE IT! I am a baker and enjoy every photo you put on! Have had a slew of friends sign up for it! Now, made this today. Although I love most of the goodies on this website, this was just too bland. I ended up putting chocolate frosting on top just to give it some “oomph”!! Nowhere near chocolatey enough for me! Also, I would love it if people would post comments on this site that are constructive to the actual item. 95% of the comments are how good it looks or how hungry the picture makes them! Why don’t we put things that matter- like, “too sweet”,or “delicious?”!! I wish people would comment AFTER they baked the item! Just Sayin’!!
Lisa- My thoughts EXACTLY! We all know the pics are gorgeous, but the reason I scan all the reviews, is to find someone who ACTUALLY MADE the cake, not just loved the pics, or how they are going to make it, or how they are drooling over it! I too am a chocoholic and need cakes that are full of flavor! Maybe some coffee instead of water would be a nice boost of flavor, but thank you for your input! You’re the only one who MADE it, and I was wondering how the taste is.! So Thanks again! ( I too am a Lisa!)
Awesome recipe. Simplicity rocks as always.
I am a house husband.
Tried this cake today.
350 º what ??
I tried 350 cº & then came to know that it is 350º F =180º C.
Feeling Low !!
🙁
Looks like a yummy but quick to make chocolate cake recipe. I love recipes that use ingredients I am likely to have in the cupboard. Thanks for sharing 🙂
It was so easy. I had to replace with Gluten free flour and the butter with oil. But everytime I bake these kind of cakes, it always breaks on the top. Its not smooth on the top. What should I be doing that this doesnt happen. This is not the first time
Cakes most often crack on top because the oven temperature is too high. I’d recommend getting an oven thermometer to check the accuracy of your oven’s temperature. Also, opening the oven door frequently while the cake is baking can cause cracking. I don’t bake with gluten-free flour, so I can’t say if that could be causing any issues.
Lovely recipe. Although the water content in the cake evaporates, leaving the cake to be dry n muddy. The second time i baked, i replaced the butter with oil n also substituted buttermilk.
This recipe was perfect for my grandson and to baked. We used a cup of water only and it came spongy. We loved it.
I’m glad you two enjoyed it, Liz!
Made this with my 4 year old, simple but very tasty!
Thanks for the recipe
I’m glad you enjoyed the cake!
I don’t know why I torture myself! I live at 7,200’ elevation so cakes are out of the question😥
Hi, Deb. I live essentially at sea level, so I can’t help much with that. King Arthur has some seemingly good tips.
Dutch processed cocoa or natural?
I use natural.
Don’t try this in a 9inch pan that isn’t over two inches deep. Lit my oven on fire and the house smells like a burned-out chocolate factory. That said, my bad for thinking close to two inches is enough. Was able to spatula some of the burned batter from the spillage and it’s fantastic. Serving the other half later tonight.
Oh, no! Shallow cake pans have ruined many a cake. I’m glad you were able to salvage some of the remaining cake. I hope you’ll give it another try in a different pan!
I have to tell you that I don’t like the instructions of this recipe. They are way off. A 9 inch pan is far too small. You can actually make an entire two layered cake with this recipe. I used a long 13X9 inch and then the time? 55 minutes to an hour? Seriously that is way off. I was grateful I checked it so much earlier. I would advise people to check after 30 minutes. I don’t want to be rude but its way way off.
Hi, Kari. This is a big, tall cake, so I can see where you’d be hesitant to make it in a single pan. However, I’ve made this cake many times just as it’s written and it turns out beautifully. Baking it in a larger pan makes it thinner, of course, so the baking time would definitely be affected.
I wish I paid attention to this review. Exactly my experience. Started with the 2 inch deep tin, ended up with two cakes and they are very dry and overbaked. I am not a good baker, so it may be me but I followed the reciepe exactly and I thought this was way too much flour, way too much sugar as I go..
I’m sorry you had troubles, Penny! Dividing the batter into two pans would definitely lead to over-baked cake if you don’t reduce the baking time. I’ve made this cake many times and it turns out just as pictured here. If you didn’t change anything at all about the recipe and you’re confident in your measurements, take a look a the process photos and the video and maybe you can see what’s different for you.
The cake was ok but not sweet enough for me. And I even substituted with 15og white sugar. And used coffee instead of water. The texture is powdery and crumbles easily. I’ll wait and see how it tastes the next day after being refrigerated overnight.
We liked the recipe, I find the sweetness just right. We dont like things too sweet. In my oven 55 minutes is probably too long. Next time I will try to test after 45. Overall I will make it again. Everyone liked it.
I’m glad you enjoyed the cake, Bianca!
Made this tonight. No issues with 9 inch pan except the cake was not done in center after 40 min. Rest of it would have been overcooked for much longer. Suggest lower temperature for such deep cake and required time to finish. Taste and texture very good in the “done’ portions. Used milk instead of water. Would try again to get right because it was tasty. Cocoa really makes it almost bittersweet which I prefer.
I’m glad you enjoyed the flavor! If you weren’t already, be sure to use a light-colored metal pan so the edges don’t get over-baked. You might also check your oven’s temperature accuracy.
I just made this cake and haven’t taken it out of the pan yet. I took it out of the oven after 40 minutes as i could smell it staring to burn. . It’s cooked through and is spongy to the touch. No idea how it tastes yet and I’m hoping it’s not over cooked as I need it for a coworkers birthday tomorrow! I also substituted cacao for cocoa and I’m hopeful it’s okay. Might make some icing tomorrow morning?
Hi, Kia! Thanks for sharing your experience! If the cake feels spongy, it should still turn out well, even if it baked a little faster than expected. (That can happen with a dark pan or inaccurate oven temperature.) The cacao substitution may give it a slightly more intense, bitter flavor compared to cocoa, but icing should help balance that out. A simple syrup soak could also add moisture if needed. Hope your coworker enjoys it! Let me know how it turns out!
I made this cake yesterday `nd it turned out absolutely delicious! Thanks for this recipe!
What I did differently, in case anyone is interested:
I used 1 cup of liquid only and substituted the water with milk and 2 espressos (total 240g of liquid combined)
I would also recommend to sift flour, I did and the result was amazing
Halfway in the oven I covered the top of the cake with aluminium foil so that it kept cooking but it didn’t burn
Hi, Tati! So glad it turned out beautifully (and deliciously)!